Setting up Activity Mapping
Mapping facilitates the seamless transfer of data from a source (e.g., activity output, REST service) to a target (e.g., activity input, response schema). It ensures accurate and efficient data flow between components.
1. Key Components
Mapping Availability
- Mapping is available in every activity’s input configuration tab.
This ensures that users can define how data flows into an activity during workflow execution.
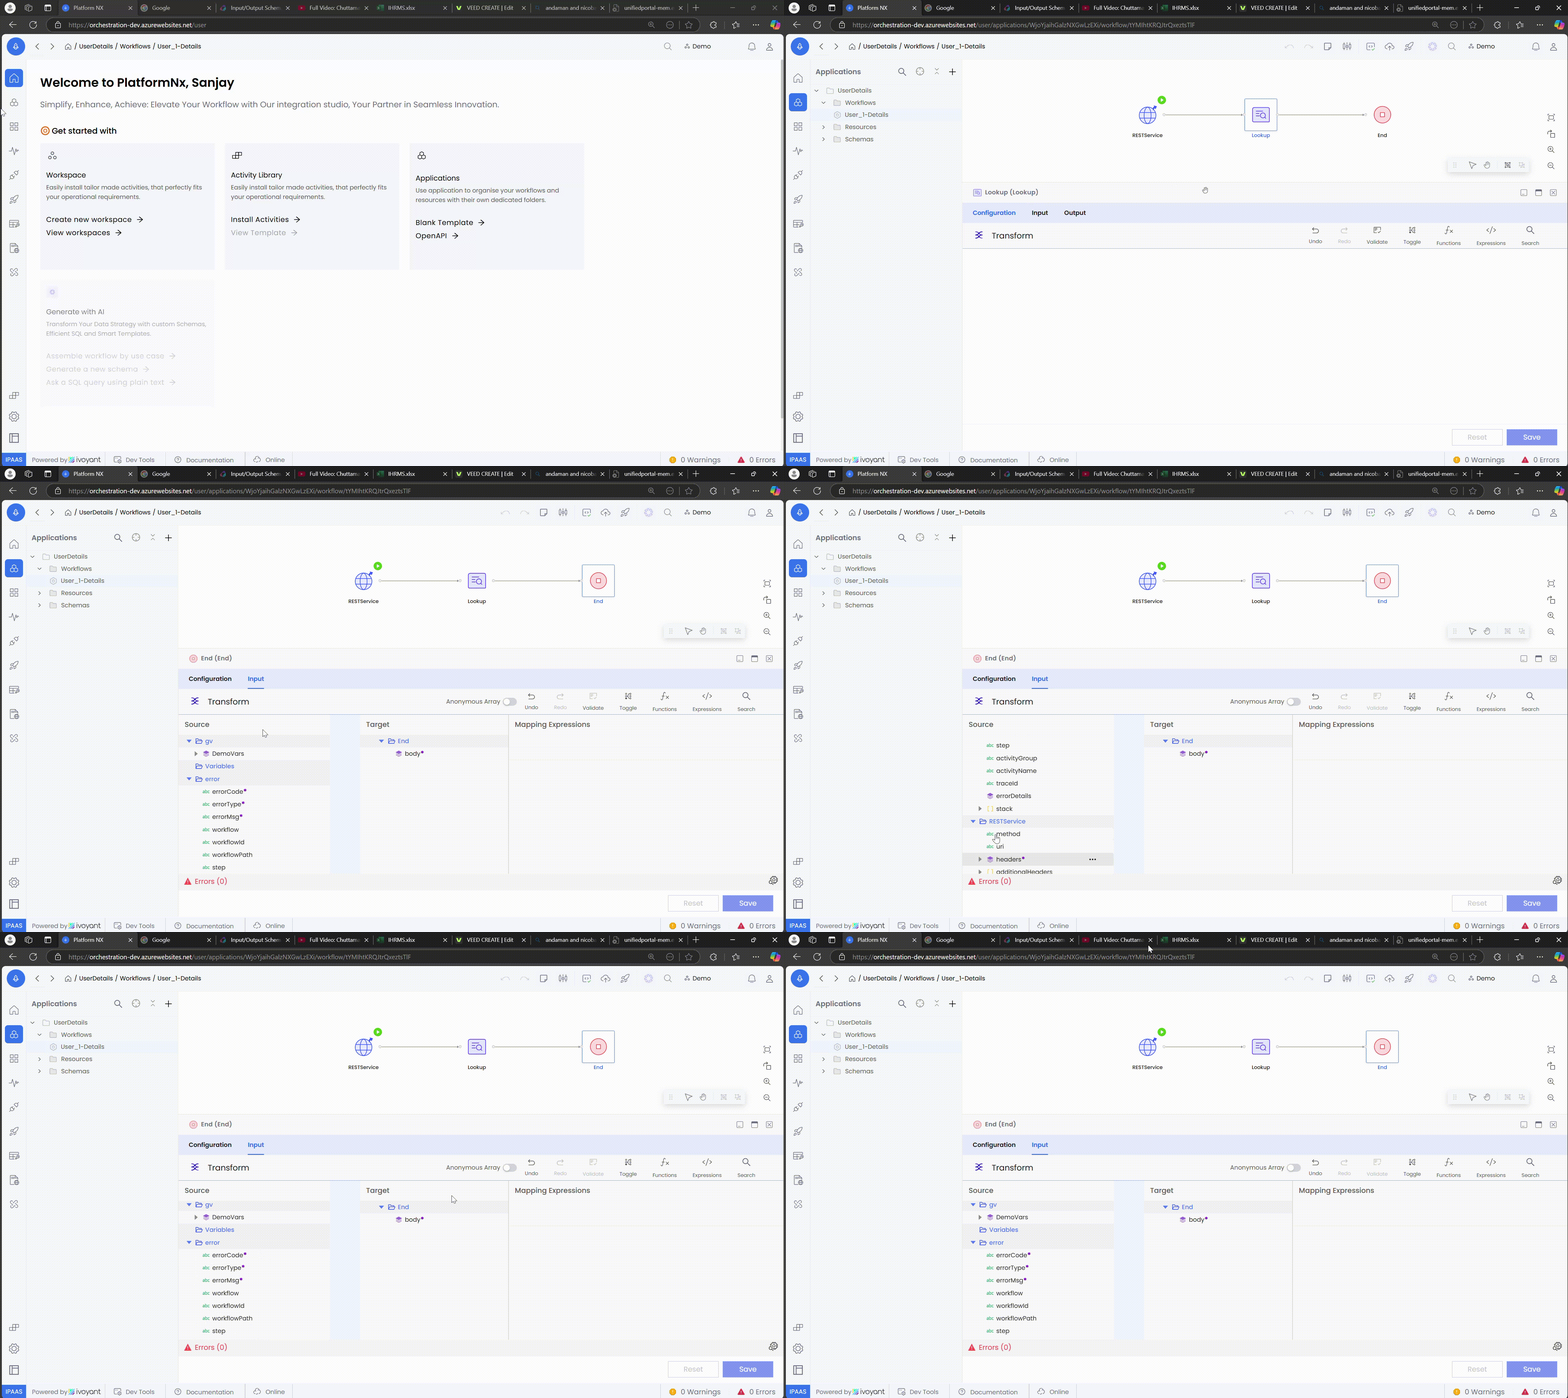
Source and Target
- Source: The origin of the data, such as an activity output or an external system.
- Target: The destination for the data, typically defined in the activity’s input configuration or schema.

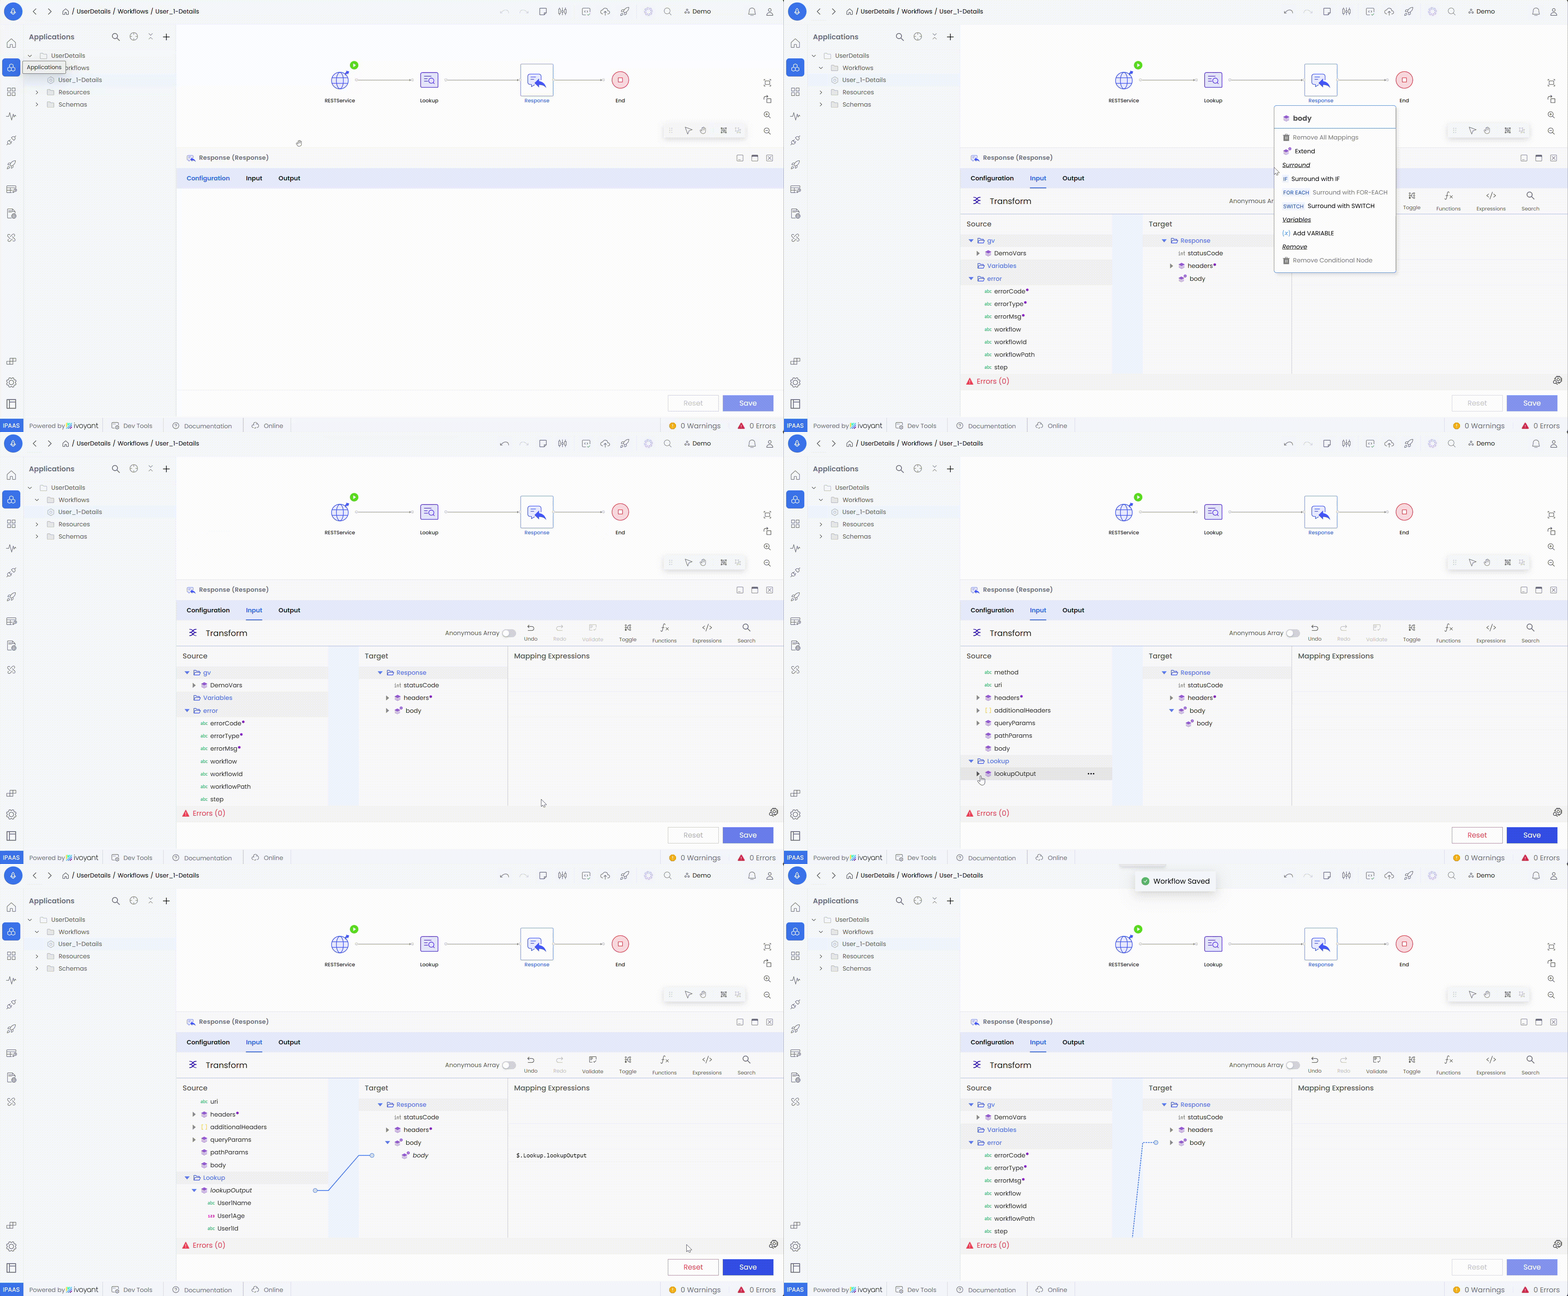
Schema Extension
- If an activity has a default schema, users can extend the schema in the target configuration.
- Steps
- In the target area of the activity, click the three dots (kebab menu).
- Select the Extend option to add additional fields or modify the schema as per requirements.
- Steps
Drag-and-Drop Mapping
- Users can map fields by dragging a source field and dropping it onto the corresponding target field, simplifying the mapping process.

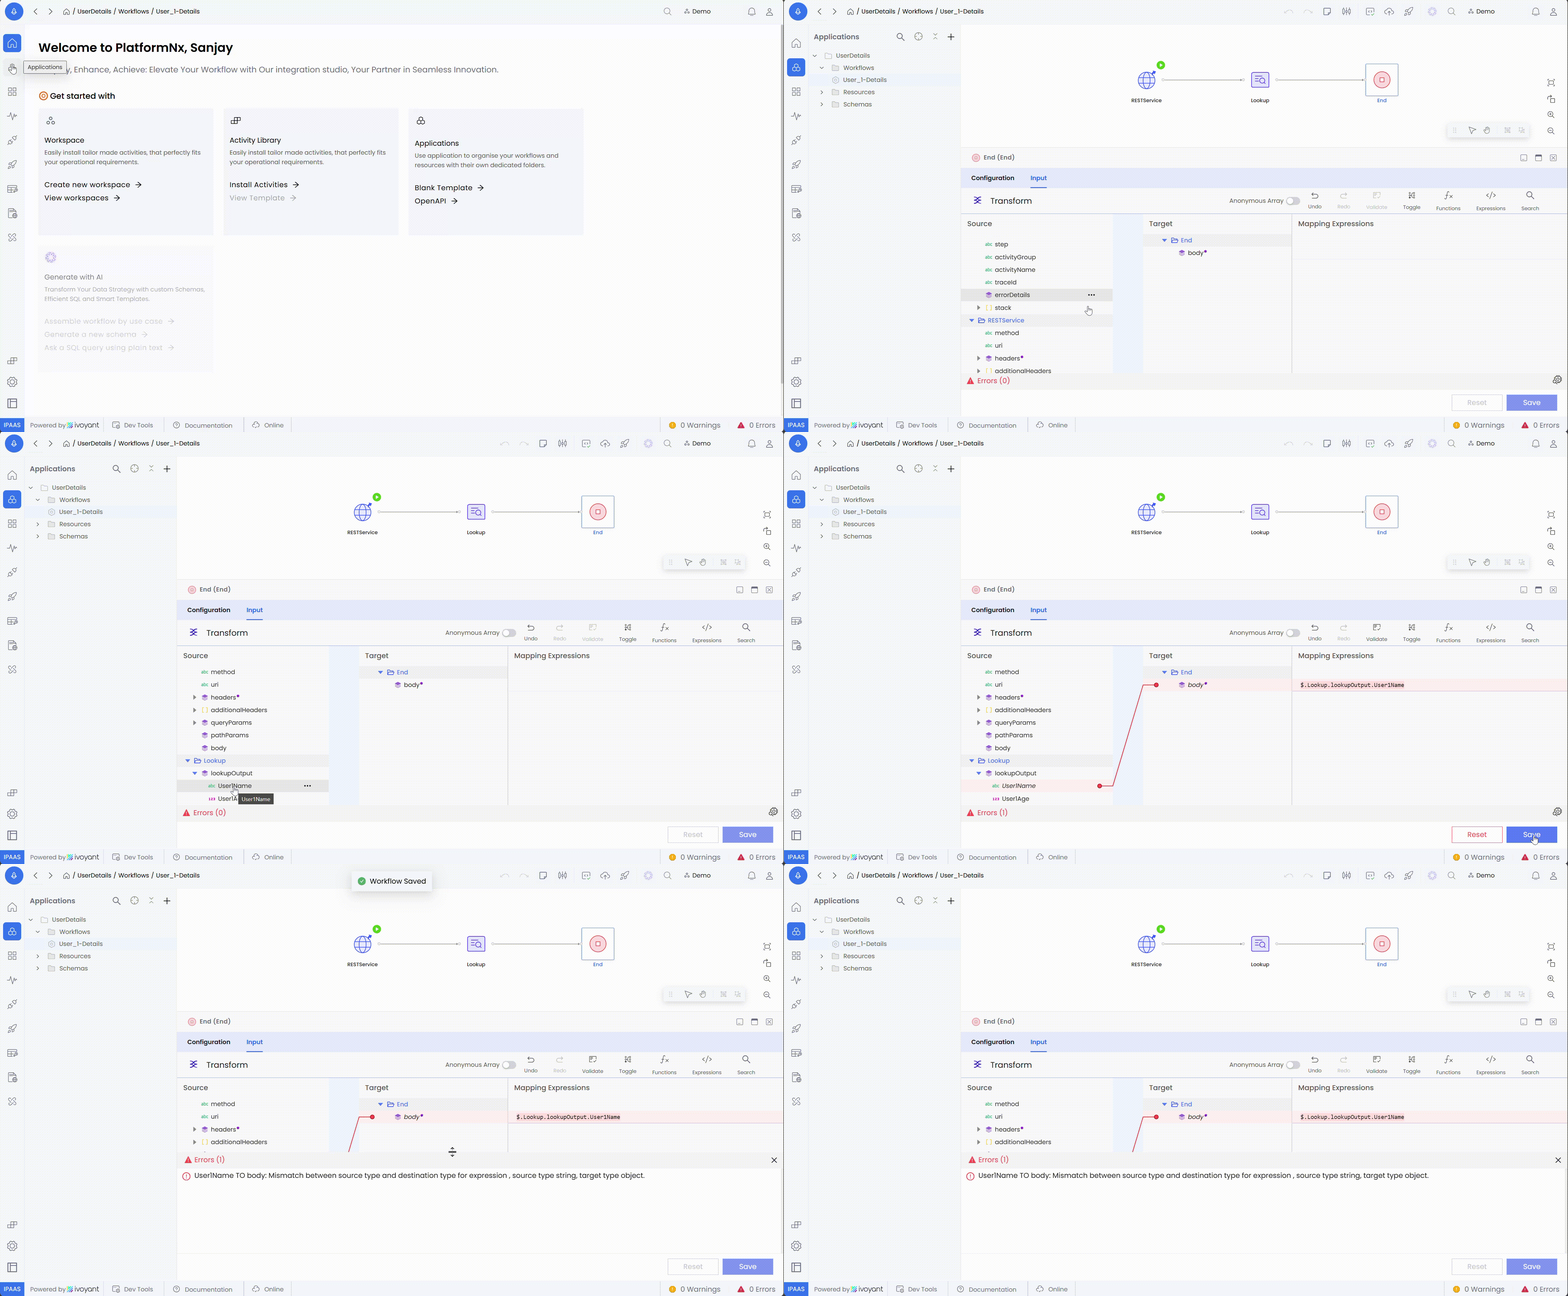
2. Validation
Validation Button
- After completing the mapping, click the Validate button to ensure correctness.
- Validation checks
- All required fields are mapped.
- Schema compatibility between the source and target.
- Correct syntax in mapping expressions.
Error Handling
- If validation fails, errors are displayed in the Mapping Error Panel, highlighting
- Missing mappings for required fields.
- Schema mismatches or conflicts.
- Invalid syntax in expressions.
3. Toggle Views
The mapping interface includes three toggle views to help users manage mappings effectively
- Default View
- Displays all fields, both mapped and unmapped.
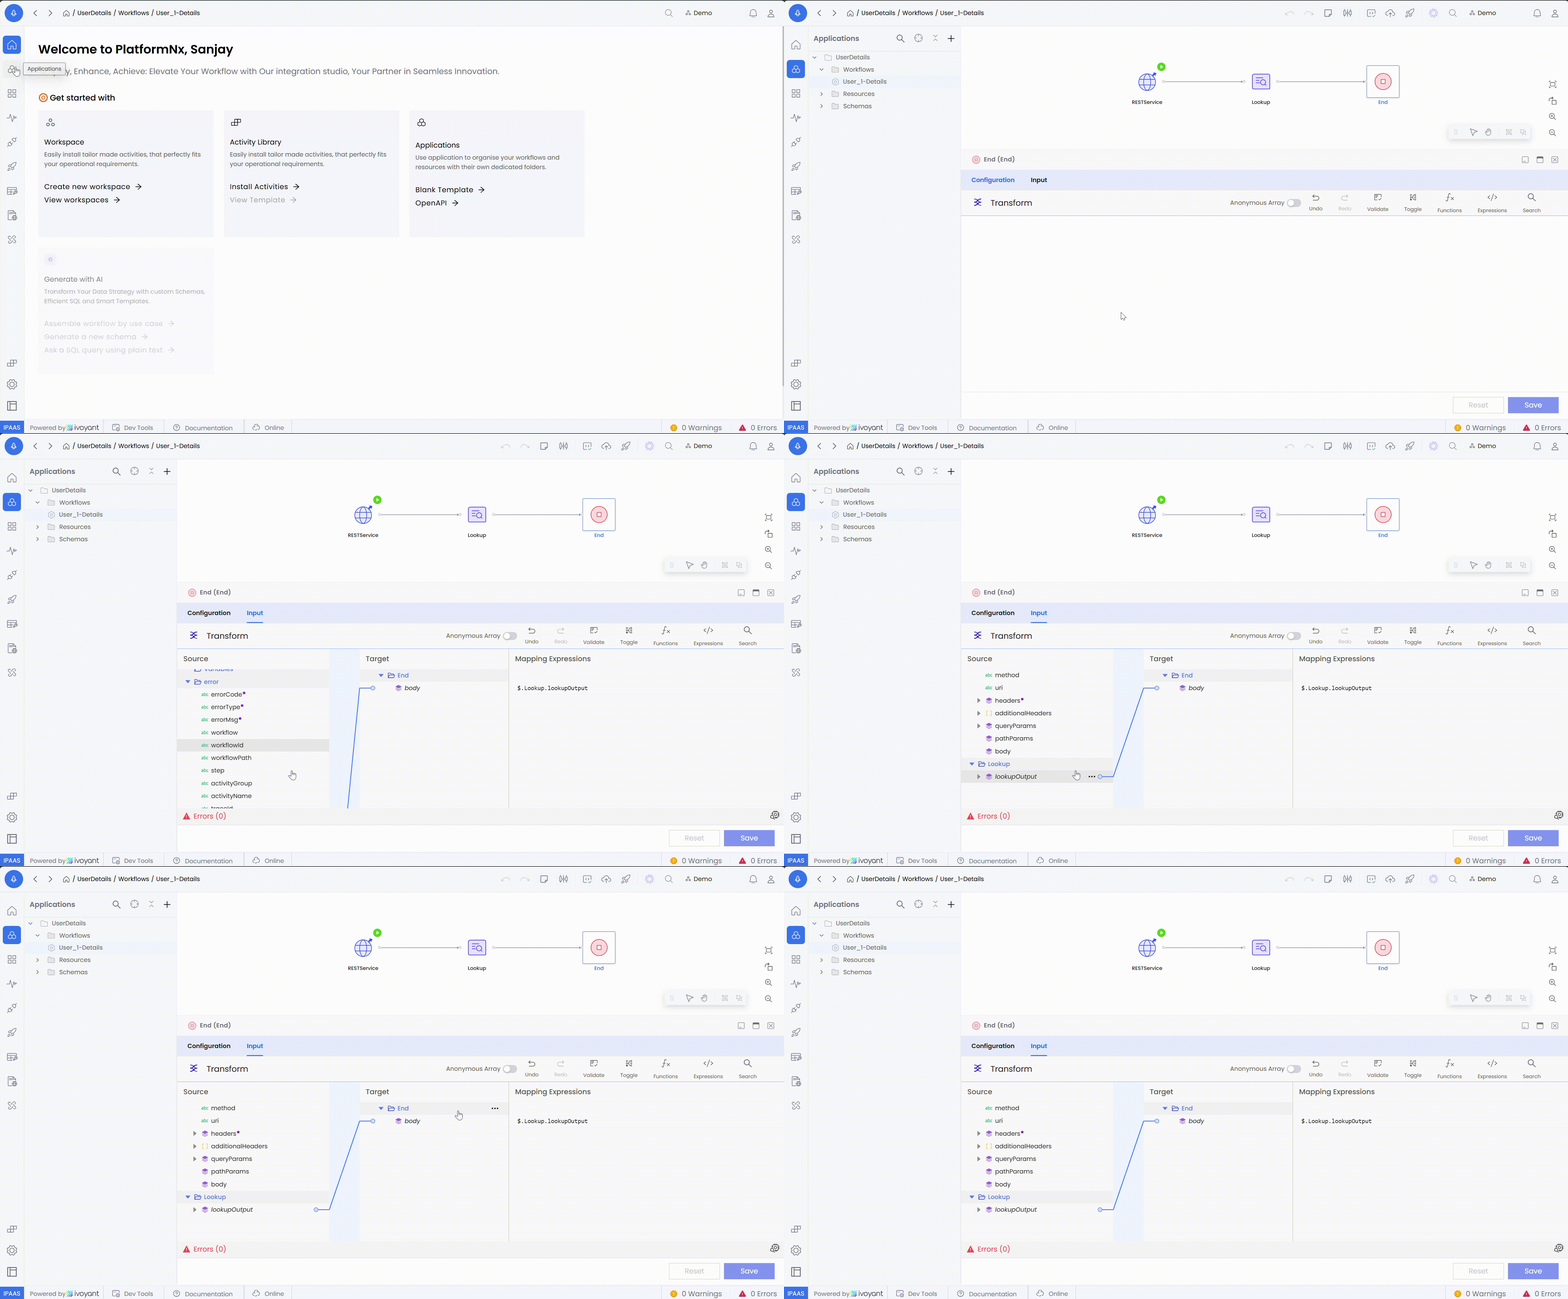
- Mapped View
- Shows only the fields that have been successfully mapped.
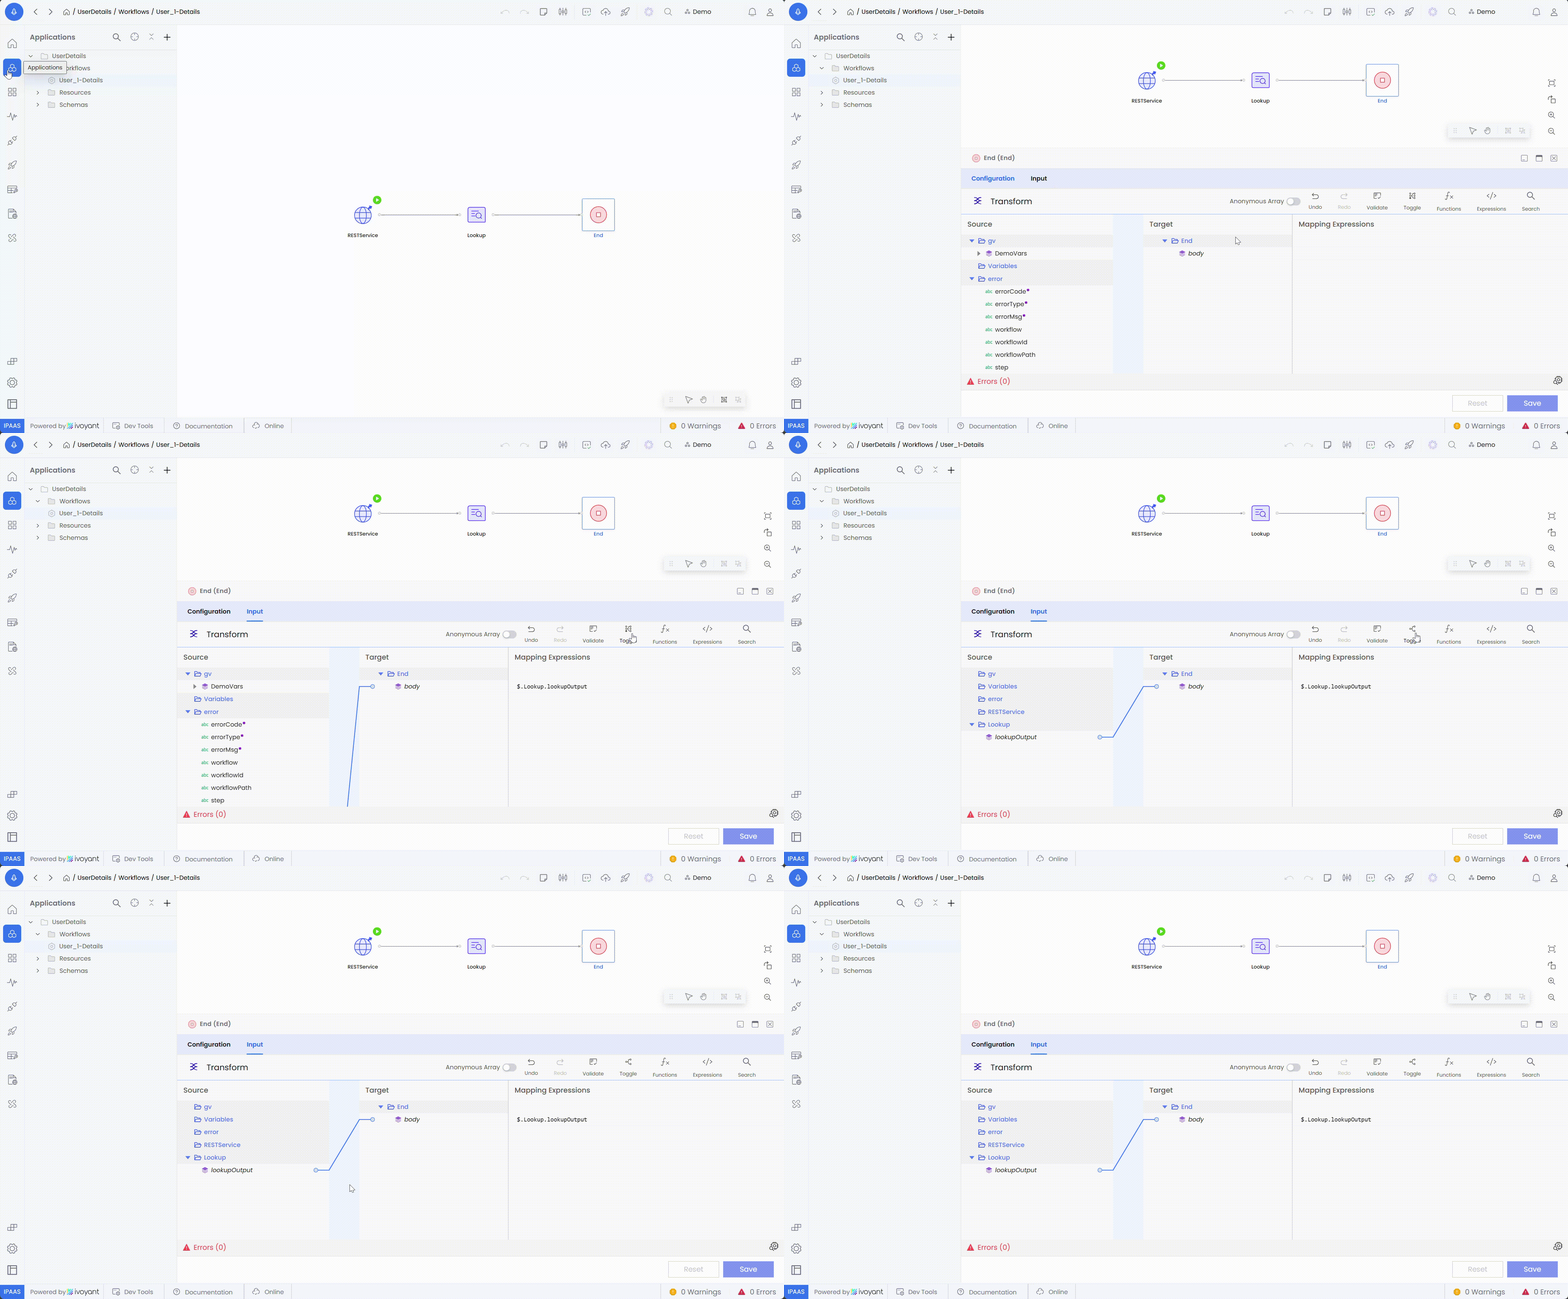
- Unmapped View
- Highlights unmapped fields, allowing users to focus on completing their mappings.
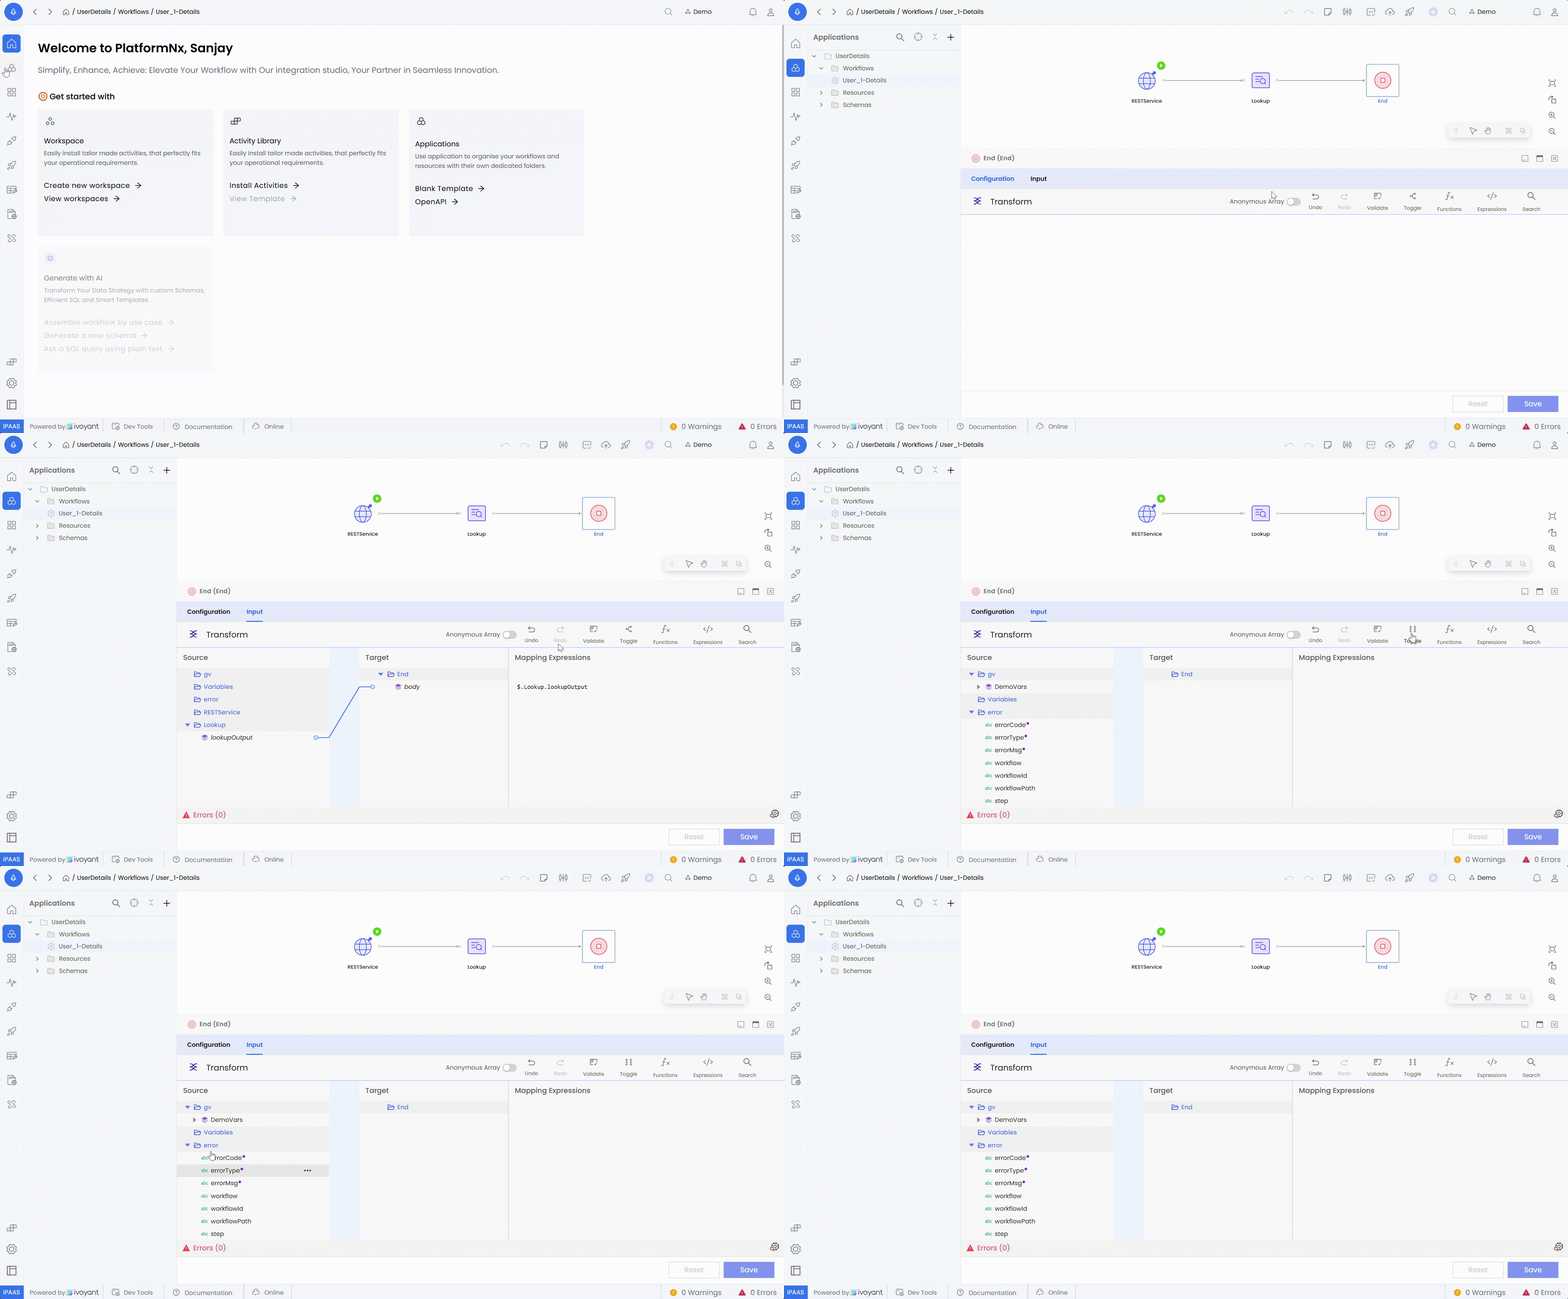
4. Simplified Mapping Expressions
Overview
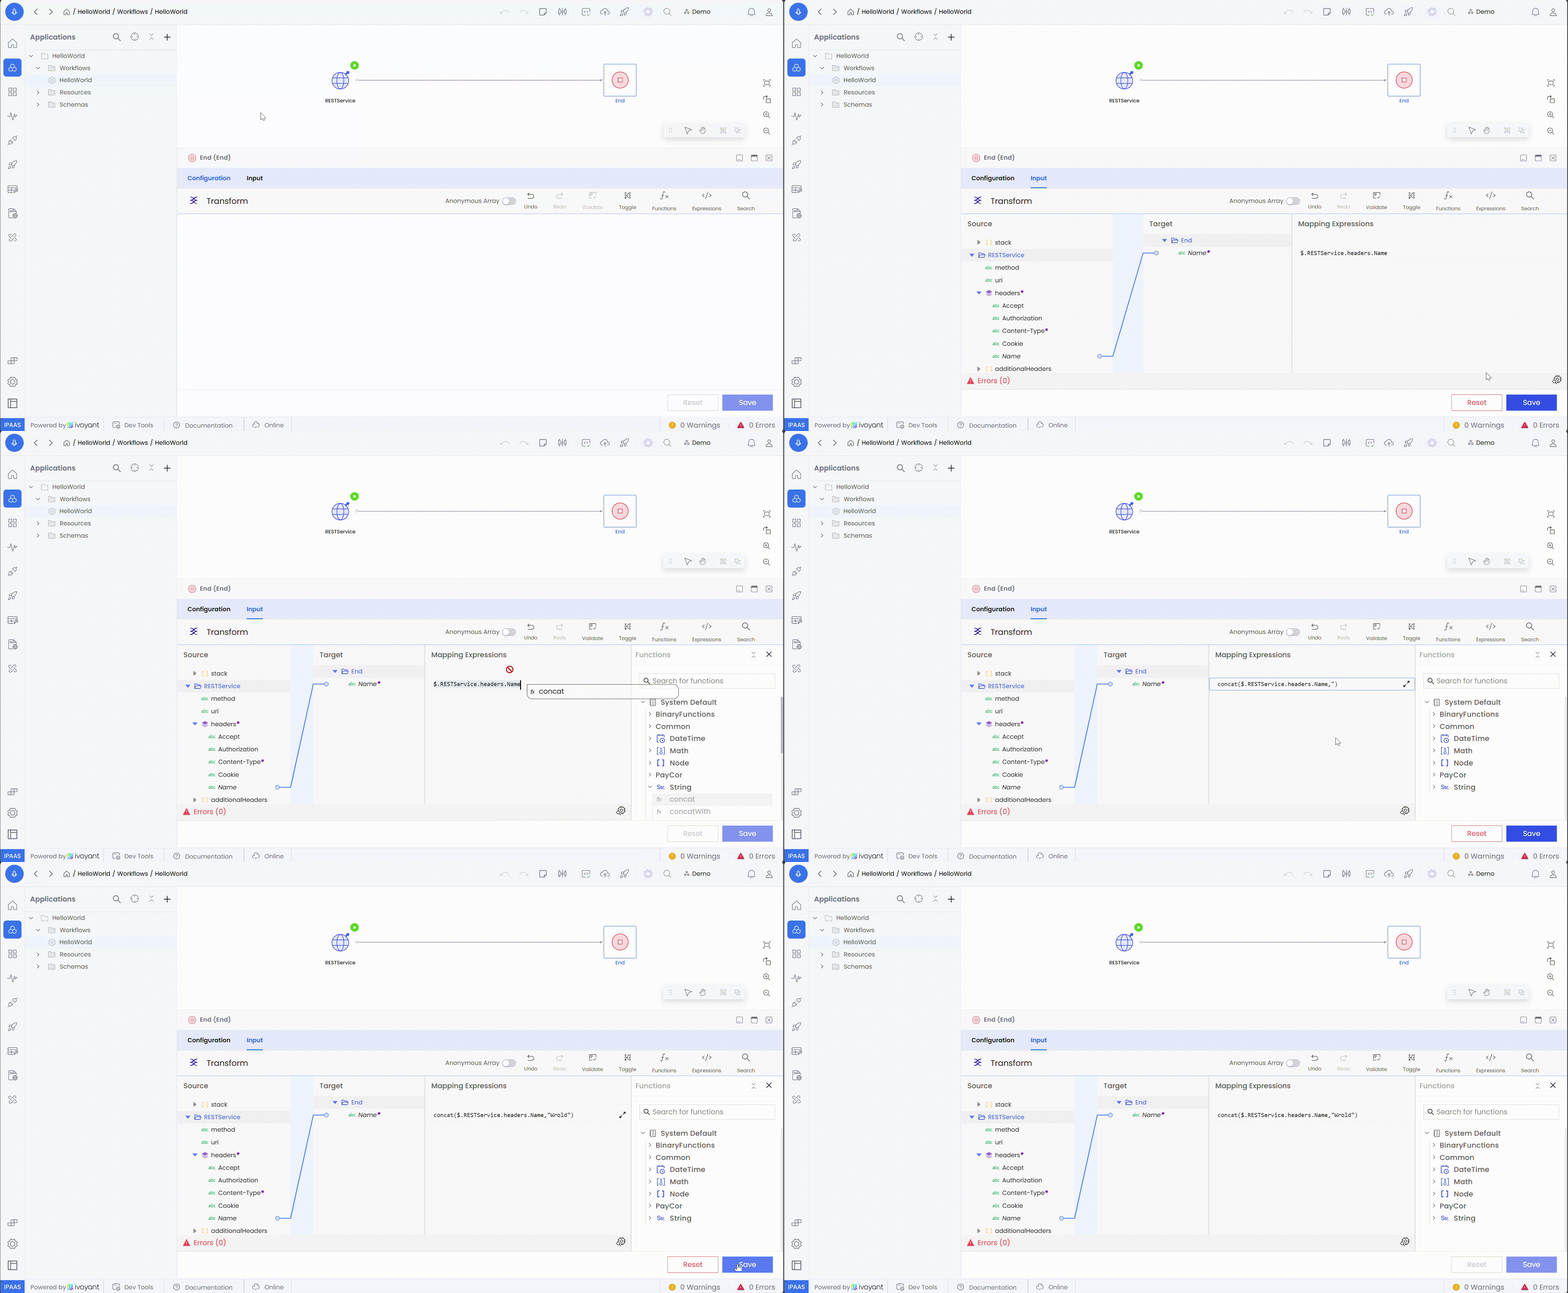
Mapping expressions allow dynamic data handling by referencing fields and applying transformations directly in the mapping interface.
Syntax
-
Reference structure
ActivityName.FieldName- ActivityName: The source activity generating the data.
- FieldName: The specific field being referenced.
Examples
-
Direct Mapping
ActivityName.FieldNameMaps a specific field from the source activity.
-
Transformation
ActivityName.Value.toUpperCase()Converts the
Valuefield to uppercase before mapping. -
Conditional Mapping
ActivityName.Discount ? ActivityName.Discount : 0Provides a default value (
0) ifDiscountis null.
5. Best Practices
- Leverage Mapping in All Activities: Always configure input mappings for each activity using the input configuration tab.
- Extend Schemas When Necessary: Use the Extend option in the target schema to accommodate additional fields as needed.
- Use Toggle Views: Regularly check mapped and unmapped views to ensure all required fields are covered.
- Validate Frequently: Click the Validate button often to identify and resolve errors early.
- Document Key Mappings: Record any complex expressions or mappings for future reference.